Creating a Scala Excel Add-In
Jinx can be used with other JVM languages, not just Java.
This tutorial shows how Jinx can be used to write an Excel Add-In exposing user defined functions to Excel written in Scala.
For this tutorial it will help if you are already familiar with Scala and building Scala projects. We’ll be using SBT as the build tool for this tutorial. If you’re using another build system you should still be able to follow along, you may just need to change a few steps.
Setting up the Project
First we’ll create a new project using SBT. If you’re not already familiar with SBT already please refer to the SBT Getting Started Guide.
Run sbt in a command prompt as follows to create the project:
$ sbt new sbt/scala-seed.g8
....
A minimal Scala project.

name [My Something Project]: jinx-scala-tutorial

Template applied in ./jinx-scala-tutorialThis will have generated a build.sbt file and the following directory structure:
jinx-scala-tutorial
|-- build.sbt
`-- project
    |-- build.properties
    `-- Dependencies.scala
`-- src
    |-- main
    |   `-- scala
    |       `-- example
    |           `-- Hello.scala
    `-- test
        `-- scala
            `-- example
                `-- HelloSpec.scala
We won’t be using the Hello or HelloSpec classes, so delete the two files
Hello.scala and HelloSpec.scala. If you have used IntelliJ to create your project
then these files may not exist.
Writing an Excel Function in Scala
An Excel User Defined Function or UDF is a function that can be called in Excel from a worksheet.
With Jinx, a Scala method is turned into an Excel UDF using the @ExcelFunction annotation. In order to get that annotation we need to add Jinx to our project dependencies by adding it to the Dependencies.scala file in the project folder:
import sbt._

object Dependencies {
  lazy val scalaTest = "org.scalatest" %% "scalatest" % "3.0.3"
  lazy val jinx = "com.exceljava" % "jinx" % "[1.0.0,)"
}
And adding it to libraryDependencies in the build.sbt file created earlier:
import Dependencies._

lazy val root = (project in file(".")).
  settings(
    inThisBuild(List(
      organization := "com.mycompany",
      scalaVersion := "2.12.3",
      version      := "0.1.0-SNAPSHOT"
    )),
    name := "jinx-scala-tutorial",
    libraryDependencies ++= Seq(
        scalaTest % Test,
        jinx
    )
  )
You can change the version in your Dependencies.scala file to match whatever version of Jinx you are using. When the project is built it will automatically download the dependency from Maven Central.
See SBT Library Dependencies for more details about managing dependencies with SBT.
Add a new class ExcelScalaFunctions to the project by creating a file called ExcelScalaFunctions.scala in the
src/main/scala folder. If you are using an IDE you can use that to create the new class in the project.
We’ll write a simple fibonacci method that given any positive number n returns the nth number in the Fibonacci sequence. It’s not important what this method is, it’s just to illustrate exposing some Scala to Excel as a user defined function.
The @ExcelFunction annotation is applied to the fibonacci method, and it’s this that exposes the
method to Excel as a user defined function.
import com.exceljava.jinx.ExcelFunction

class ExcelScalaFunctions {
  @ExcelFunction
  def fibonacci(n : Int) : Int = n match {
    case 0 | 1 => n
    case _ => fibonacci(n - 1) + fibonacci(n - 2)
  }
}
This tutorial will not go into writing unit tests for this function, however you may choose to for you own functions as the @ExcelFunction annotation has no effect when used outside of Excel.
Now we’re ready to build the code into a JAR. This is done using the SBT command package.
$ sbt package
...
[info] Packaging C:\projects\jinx-scala-tutorial\target\scala-2.12\jinx-scala-tutorial_2.12-0.1.0-SNAPSHOT.jar ...
[info] Done packaging.Now you should have a file called jinx-scala-tutorial-{version}.jar in the target folder in your project directory. If using IntelliJ or another IDE you may need to check your settings to find where the artifact is output to. Make a note of the location of the JAR file as we will need it in the next step.
Calling the Scala Function From Excel
If you haven’t already, download Jinx from the download page.
Inside the downloaded zip file you’ll find the Jinx config file, jinx.ini. We need to make some changes to this file so that Jinx knows where to find the JAR file and what classes to load.
Update jinx.ini with the following, replacing the classpath with the actual location of the JAR built earlier.
[JINX]
classes = ExcelScalaFunctions

[JAVA]
classpath = C:/path-to-project/target/scala-{vesion}/jinx-scala-tutorial-{version}.jar
You’ll see in the jinx.ini file there’s also a section at the bottom for logging. That determines where any logs will be written to and if you have any problems always check the log file as often it will tell you what’s gone wrong.
Now we’re ready to start Excel and install the Jinx add-in by doing the following:
- Select the File menu in Excel and go to Options -> Add-Ins -> Manage Excel Addins
- Browse to the folder you unzipped Jinx
- Select jinx.xll or jinx64.xll depending on whether you are using 32 bit or 64 bit Excel
If you get an error saying that jinx.xll is not of the correct format, most likely you’re trying to load the 64 bit version into a 32 bit version of Excel or vice-versa. If this happens just go back and choose the right xll file.
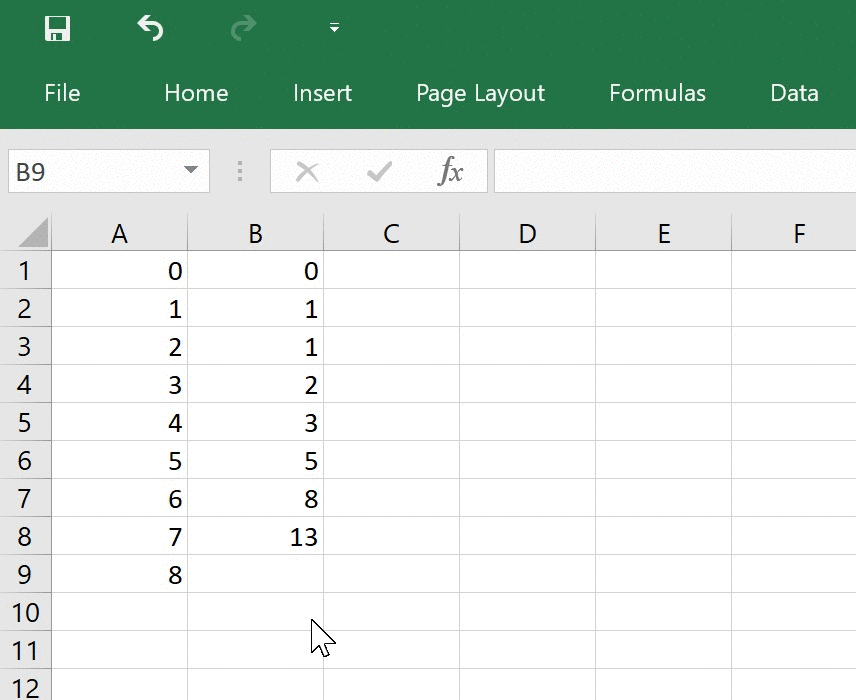
If everything has worked correctly, you should now be able to call the fibonacci function in Excel.
As the example function is the naive recursive implementation of fibonacci you should expect poor performance for anything other than low numbers!
If you don’t see the fibonacci function in Excel, check your log file for errors. You can set the log level to
finest in your jinx.ini file to see what’s happening in more detail if necessary.
You can read more about writing user defined functions in the user guide, and if you have any questions please contact us.